Start Your Seedlings From Scratch
Posted on March 23, 2016 by Peter Comart
|
4 comments
There are a host of reasons to grow your own seedlings from scratch. And it is not too late. It is satisfying, saves money, and allows you to control the quality, quantity, and variety of your seedlings. It also is highly recommended where there is a short growing season.
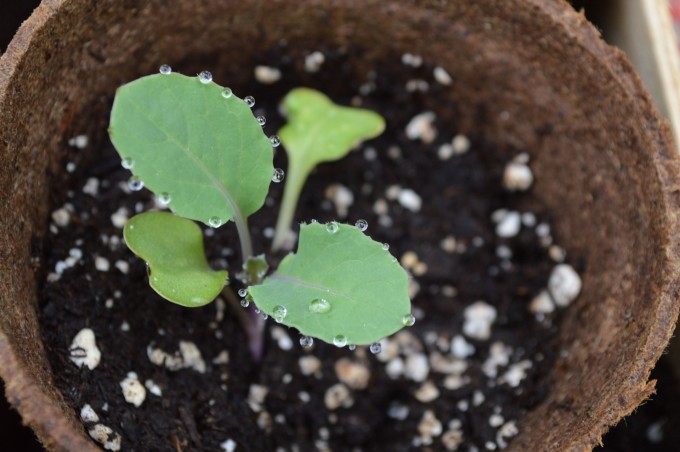
Many of us got our first seedling experience helping Grammy or Far-far start seeds, or in 2nd grade as a class project. But everyone knows, you don’t have to be a kid to get excited about this seasonal miracle, the sight of those first delicate pre-leaves (actually called cotyledons) popping out of the dirt on a sunny kitchen windowsill or porch. There is something magic about it, especially while there is still snow on the ground outside.
Here is all you need to start your own seedlings from scratch: a warm place–with a constant light source once seeds begin to germinate; containers; seeds; soil or potting medium; and plastic sheeting to keep warmth and moisture in.
All seeds initially require warmth, generally 55°F to 85°F to grow. Southern sunlight is often all you need–along with the ambient inside room temperature–even before germination. There are seed types which germinate best in total darkness, or at optimum temperatures of 95°F, so read your seed packet instructions. If you are using last year’s seeds, you may not get as many to germinate. Direct southern exposure in a draft-free space is optimum, but orientations well off due south certainly work. (If it is a place where your cat likes to nap, it should work.) Next to a window may be perfect during the day, but if the window is not insulated, it could get too cool at night. Once germinated, all seedlings require twelve-plus hours of sunlight each day to develop into healthy, hardy plants. Some gardeners supplement natural with artificial light; some depend entirely on artificial light.
There are myriad choices for containers. Lots of us habitually save eggs cartons, yogurt cups, and whatever-else for starting our seeds. Organic fiber pots can be planted directly in the ground, without disturbing the seedling roots. Plastic starting flats or trays are convenient to move around and often come with clear covers to reduce evaporation. There are pros, cons, particularities and preferences to all of these. But I have to say, a researcher/friend/customer has tested them all and actually recommends plastic cups or plastic starting flats. If you reuse or re-purpose containers, they should be rinsed with a weak bleach and water solution. This is one of those things I try to do in the autumn, so my containers are ready to go in the spring.
Get ten gardeners together in a room and you may hear ten different opinions on whether to use soil or a potting medium, and the best types of either. If you pot with garden soil, be aware that this can introduce weed spores and seeds, bacteria, or dormant insects to the new plants. Outside soil also tends to be heavier. Once in a container, it often compacts as it is watered. Delicate, young root systems will have a harder time in this kind of medium. At the same time, some argue it makes them stronger.
Most soil-less potting mixes rely on a base of Sphagnum peat moss and vermiculite or some other non-renewable resource. Although, renewable fiber materials such as coir—from coconut shell—are being used more and more.
Containers can simply be filled to about ¼ inch from the rim, leveled, and watered. A more thorough approach is to water the mix before-hand, stirring and breaking up clumps and dry areas. The mix should be moist, but not dripping. Filling containers or flats is a great job for children, but be careful not to compact the mixture. A gentle rap on a table and pat on top will settle any air spaces.
Planting: be sure to read the seed package instructions. Some seeds may require soaking. Most seeds can be counted out and planted individually. Tiny seeds, such as lettuce, can be sprinkled on the surface, and covered with just a thin layer of planting medium, and patted in place. A last drizzle of water will bond seed and soil.
Lastly, to keep moisture and warmth in, cover your containers or flats loosely with plastic bags, sheets, or covers, and keep them in a warm location to get things started. With regular checking and watering, in a few weeks you’ll be able to transfer sturdy, healthy seedlings into your garden. If you use Garden Mats, we recommend you try to cover your garden at least a week or two before you transplant so the mats can help even out and raise the soil temperatures. Once your plants are growing, Garden Mats will help maintain optimal and even soil temperatures throughout the growing season.
4 comments

Thanks so much! I had the best season last year due to your MatsI love them!
I had so much produce that I was making daily trips to 2 different Boys & Girls club.
I started my plants last month to get a jump on my hot and sweet pepper plants.
Started my tomatoes this month.
The last couple of years I’ve taken a kitchen napkin and sprinkled seeds on half of it and folded it over. Next I’ll wet it, but not to much. Then I’ll slip it into a plastic Baggie and flatten it out and zip it shut. Now every vegetable has it’s own green house. I staple them to the wall in my garage where I have a light overhead and keep the temperature around 60 degrees. I also mark what is in each bag. Now I can see which seeds have sprouted and can plant them into my organic cups and let grow, till I am ready to plant.
That is a great tip. We have done a similar thing with paper towels.
Thanks I agree, that is an awesome idea!